
Blanket Ladder
Happy Tuesday all! Today we have an amazing DIY for you!
Me and Tyler love blankets and we have been wanting a blanket ladder now for quite some time!
But they run anywhere from $50-$100!
We decided to visit Lowe’s and see how cheap we could make our ladder!
We hope you enjoy! This project was incredibly easy and the results are awesome!
Let us know if you tried it and how it turned out! We love seeing final results!
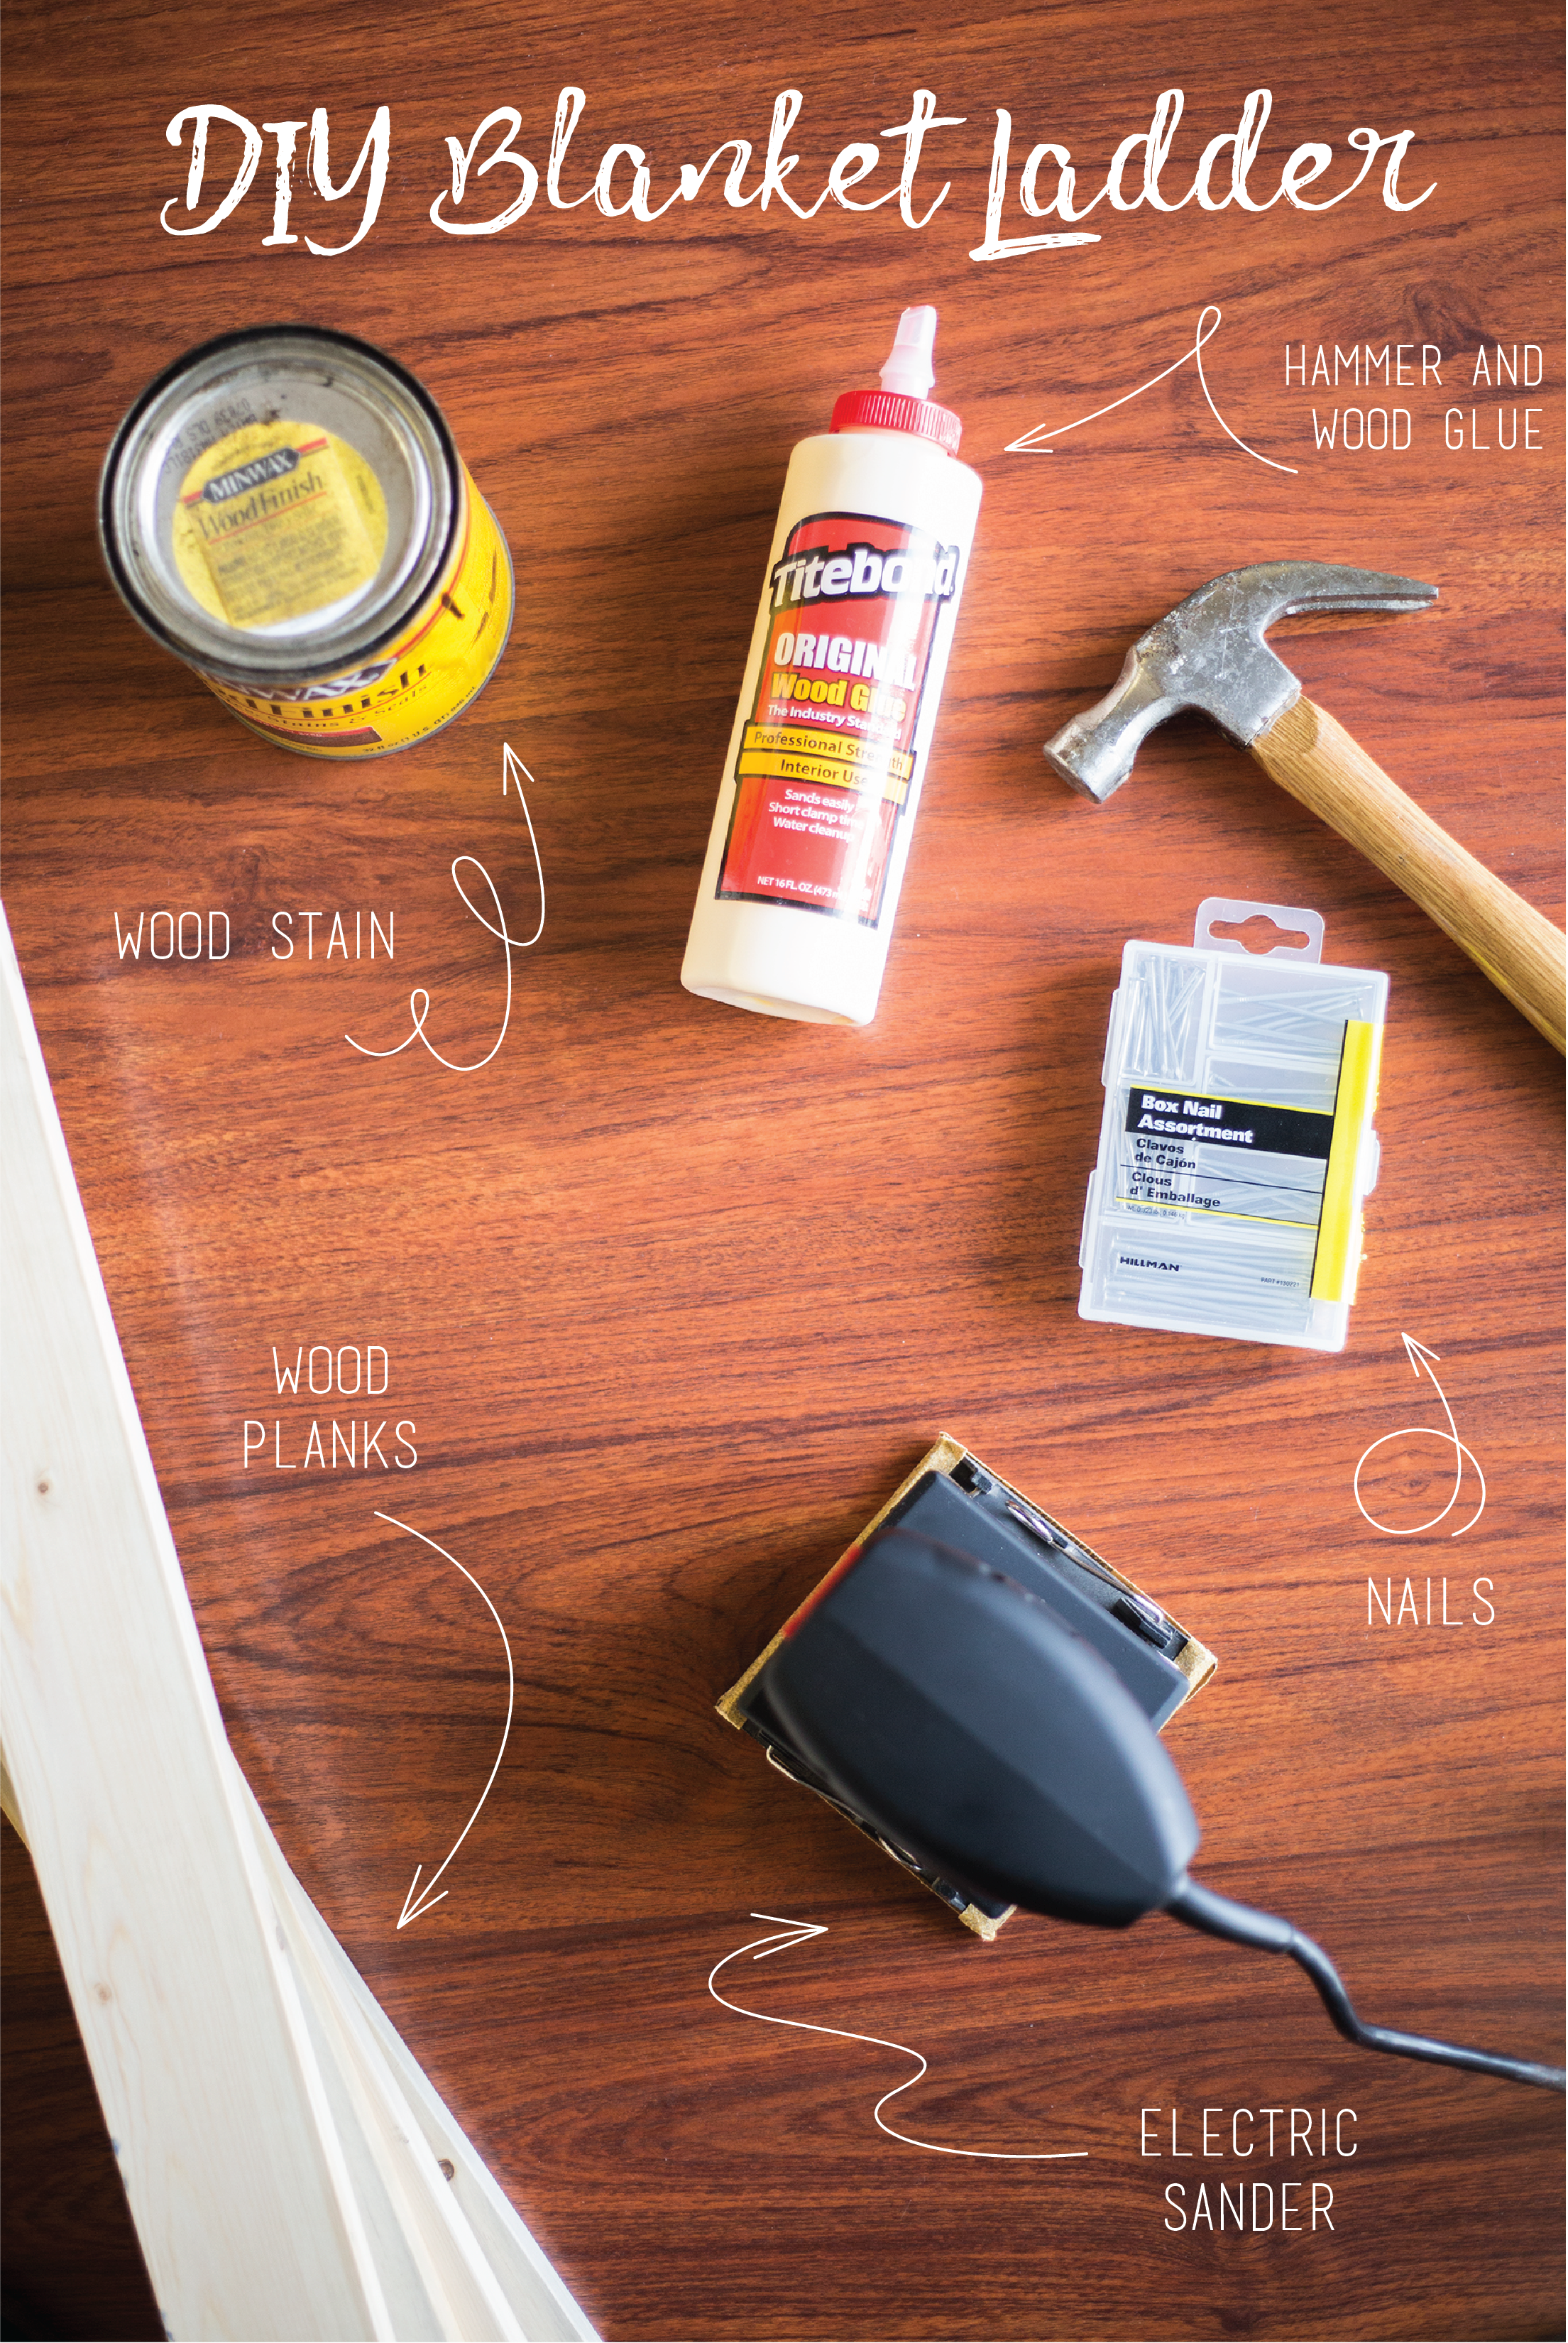

What you will need:
4 - 1-in x 3-in x 6-ft wooden planks $3.38 each
- 2 planks will be kept at 6 feet
2 planks will be cut into 20 inch pieces
24 - 1.5 in nails: we own a ton of nails so we didn’t have to buy these, but they are only a few dollars a box.
Wood Glue: You do not need to use the wood glue, but we decided to just for extra measures. $3.98
Electric Sander: We bought ours on sale for $15! They run around $20+. We use ours all the time so definitely invest in one!
Wood Stain: We got really lucky and my dad has a ton of wood stains! He let us borrow some of his, but this is the exact one we used and we loved it! $7.98
Instructions
Go to Lowe’s and pick up all the items that you will need. (Home Depot also has really cheap options.) The great thing about these kinds of projects is that you will be able to utilize all of these items on future wood DIYs. So investing in these items is great!
Remember that Lowe’s can cut your wood for you for free, so there is no need to saw the wood yourself! We had an employee help us and she did it in a few minutes.
Prep your wood. Sand the planks, especially the ends, make sure that there are no splinters. You do not want your blankets to have splinters! Sanding took us about 10 minutes; we made sure they were nice and smooth.
Stain your wood. Staining is really simple and really quick! Make sure you wear gloves! Dip the tip of a rag into the stain and rub the stain into the wood. Remember, this stain will darken quickly, so start with a light coat and move on from there if you want your wood to be a little darker. We only used one coat and were very satisfied with the end result!
After you stain all of the pieces, place your wood outside to air out. We kept ours outside for 2 days. Our apartment has a small balcony so we placed them out there.
After they are dry, it’s time to put the ladder together! Look to the image below to see where along the ladder we placed the rungs. We wanted the rungs towards the top and middle of our ladder, but you can decide how many rungs and where you want them!
We used wood glue as well as nails just to ensure that our ladder would stay together and not move. But the nails will do the job if you do not want to buy wood glue. We used 6 nails per rung. (Look at the picture below for example.) If you decide to use the wood glue, use clamps or place heavy objects as weights to ensure they stick together. We just used heavy objects since we didn’t want to buy clamps. Let the ladder rest with the clamps/weights for 12-24 hours.
It’s now time to make your ladder look cute by adding blankets!


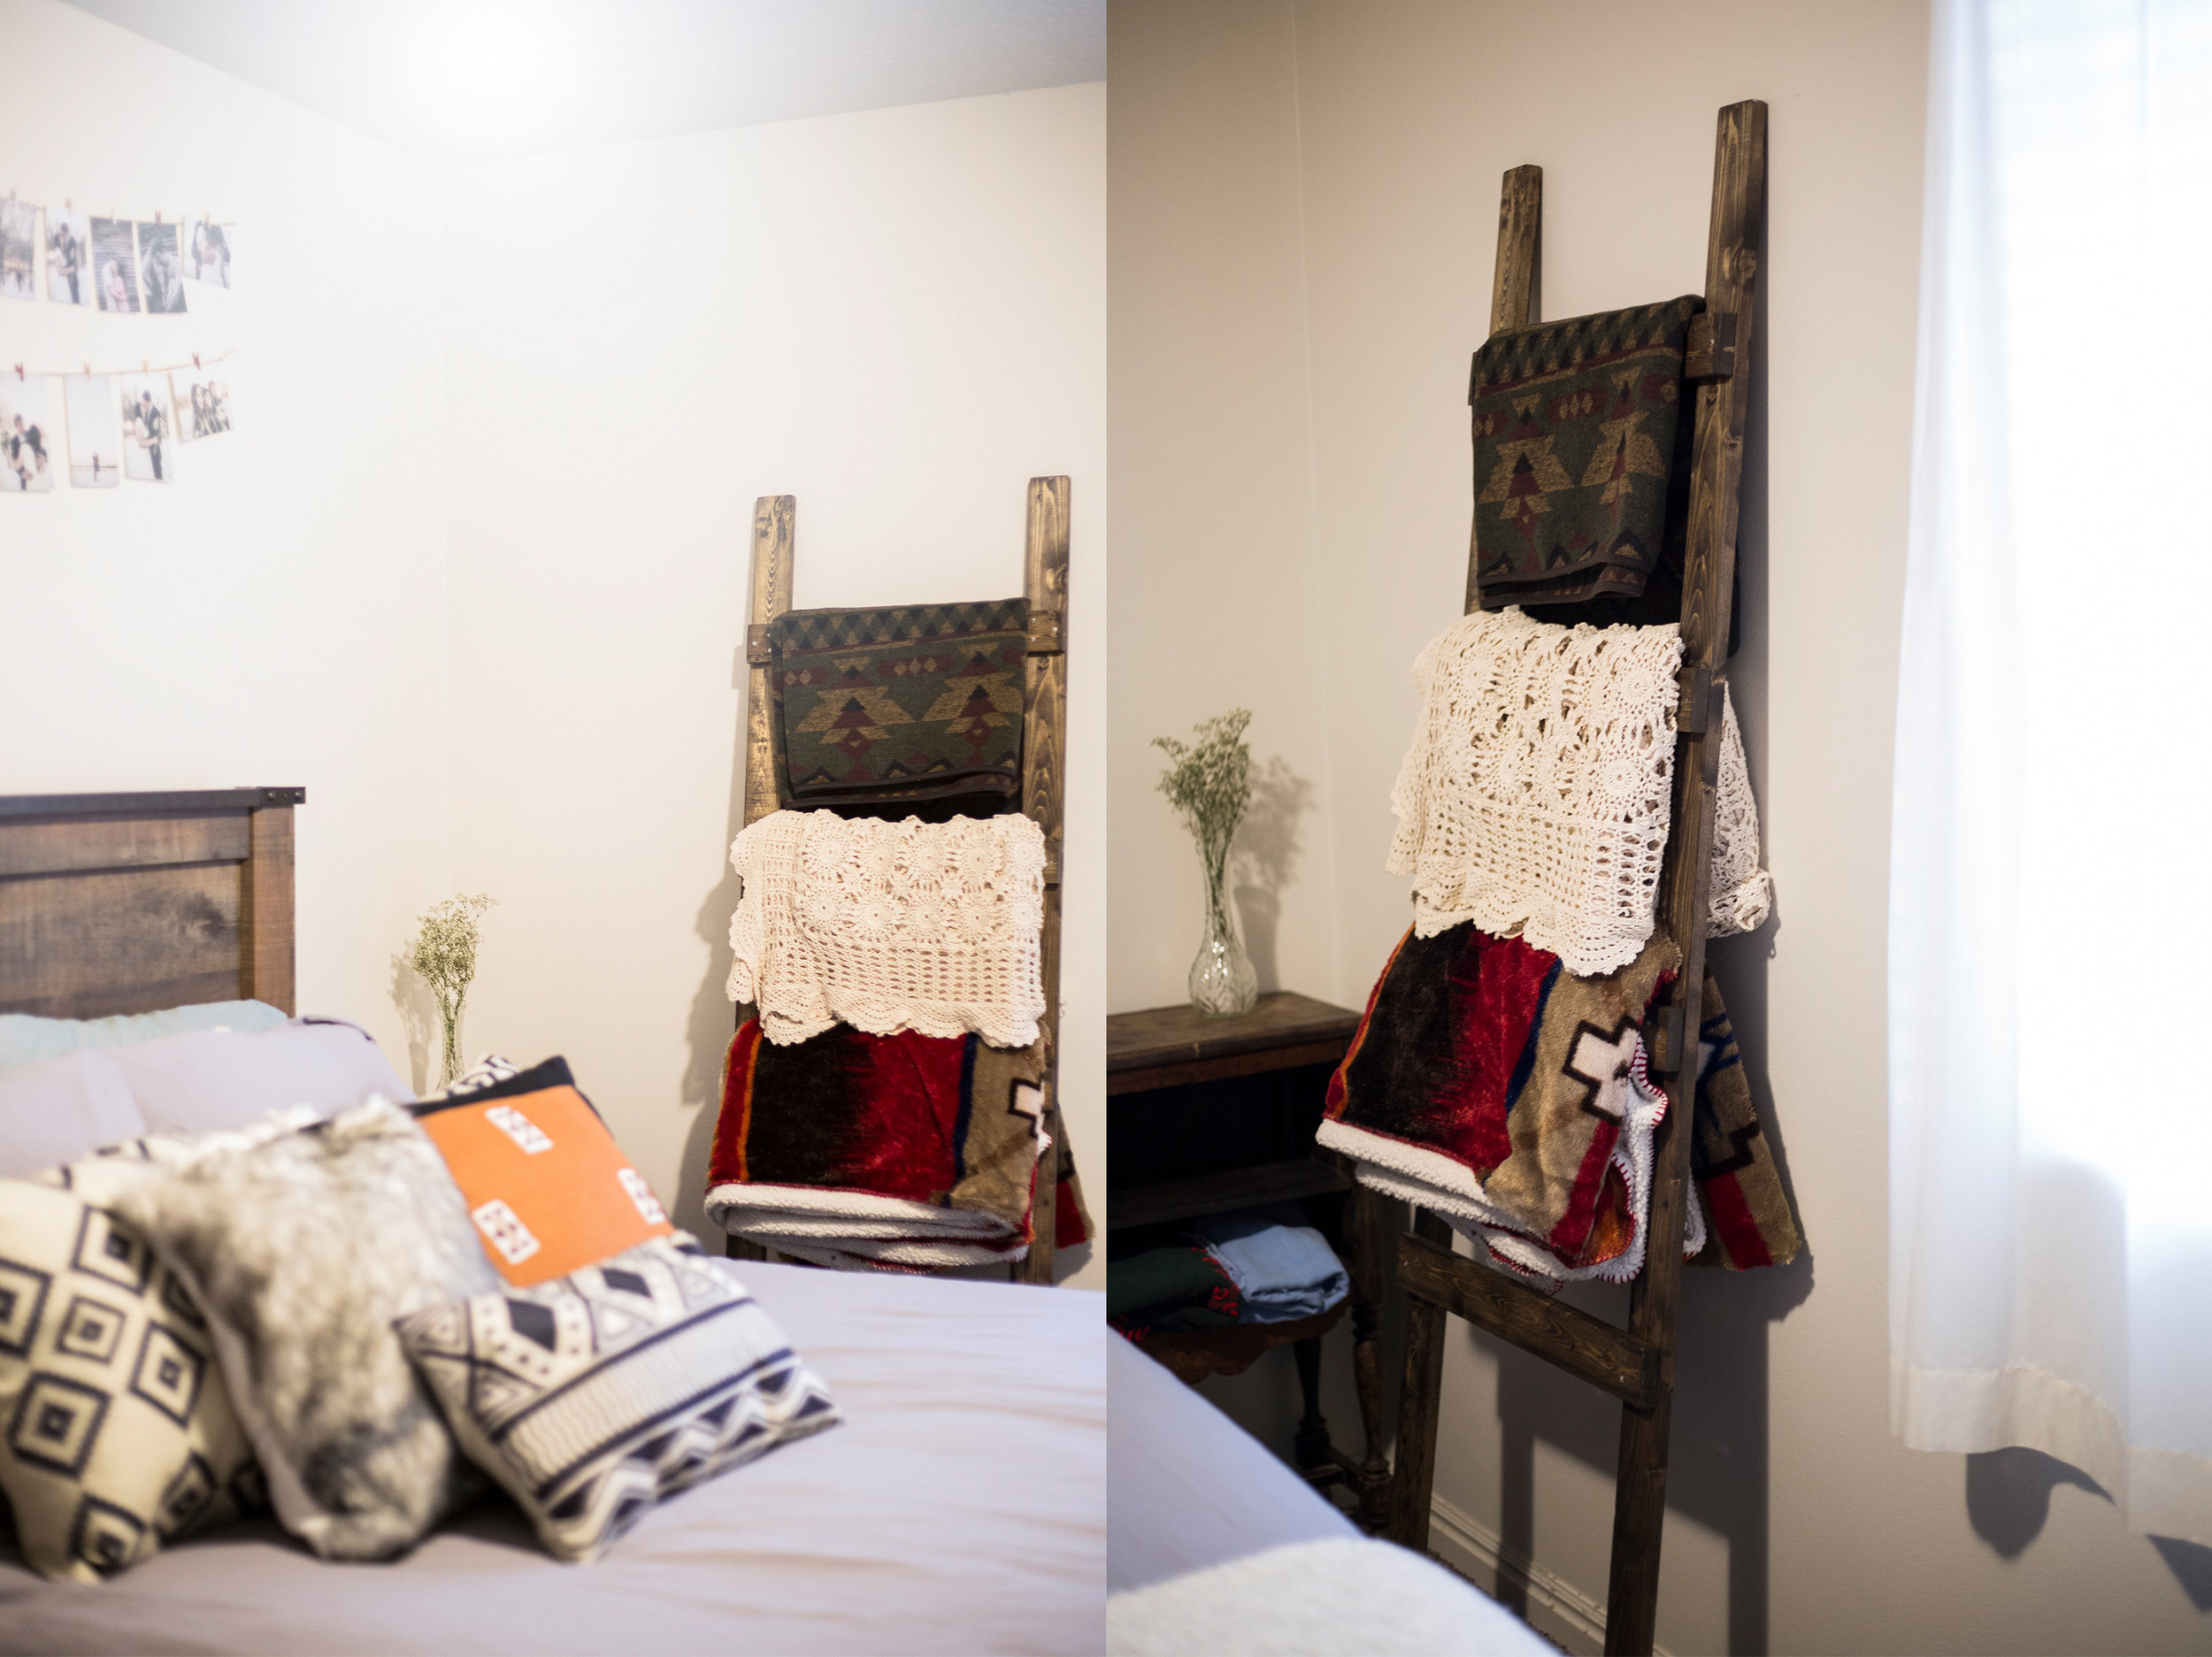


This ladder looks amazing in all rooms and it will get compliments! We have been moving ours from our bedroom to our living room just to change things up and we love it!
And for those who want to know how thrifty this DIY was … it was only $17.50 for us since we only had to buy the wood and the wood glue! A fraction of the price!
If you try this project, take a picture and tag us in it @thewandryway!
We cannot wait to see how it turned out!


