
DIY Shelves
Guys!
This was a large project for us!
We have been working on it for a few months for a couple of reasons.
Firstly, we do not have a lot of money and so we had to buy our supplies over the space of two months. Secondly, we ran into some difficulties that pushed our project back another three weeks. And thirdly, we wanted to make sure that our final project looked good enough to share hehe.
But have not fear, we think we did a pretty good job!
Tyler and I live in a small apartment and we have been dying to put shelves up in our room ever since we moved in. We checked IKEA for shelving units and realized that the frugal options were not so frugal or our style. We checked KSL and thrift stores in hope that we could get lucky and find some shelving units, but no luck!
Then we were inspired by this blog post!
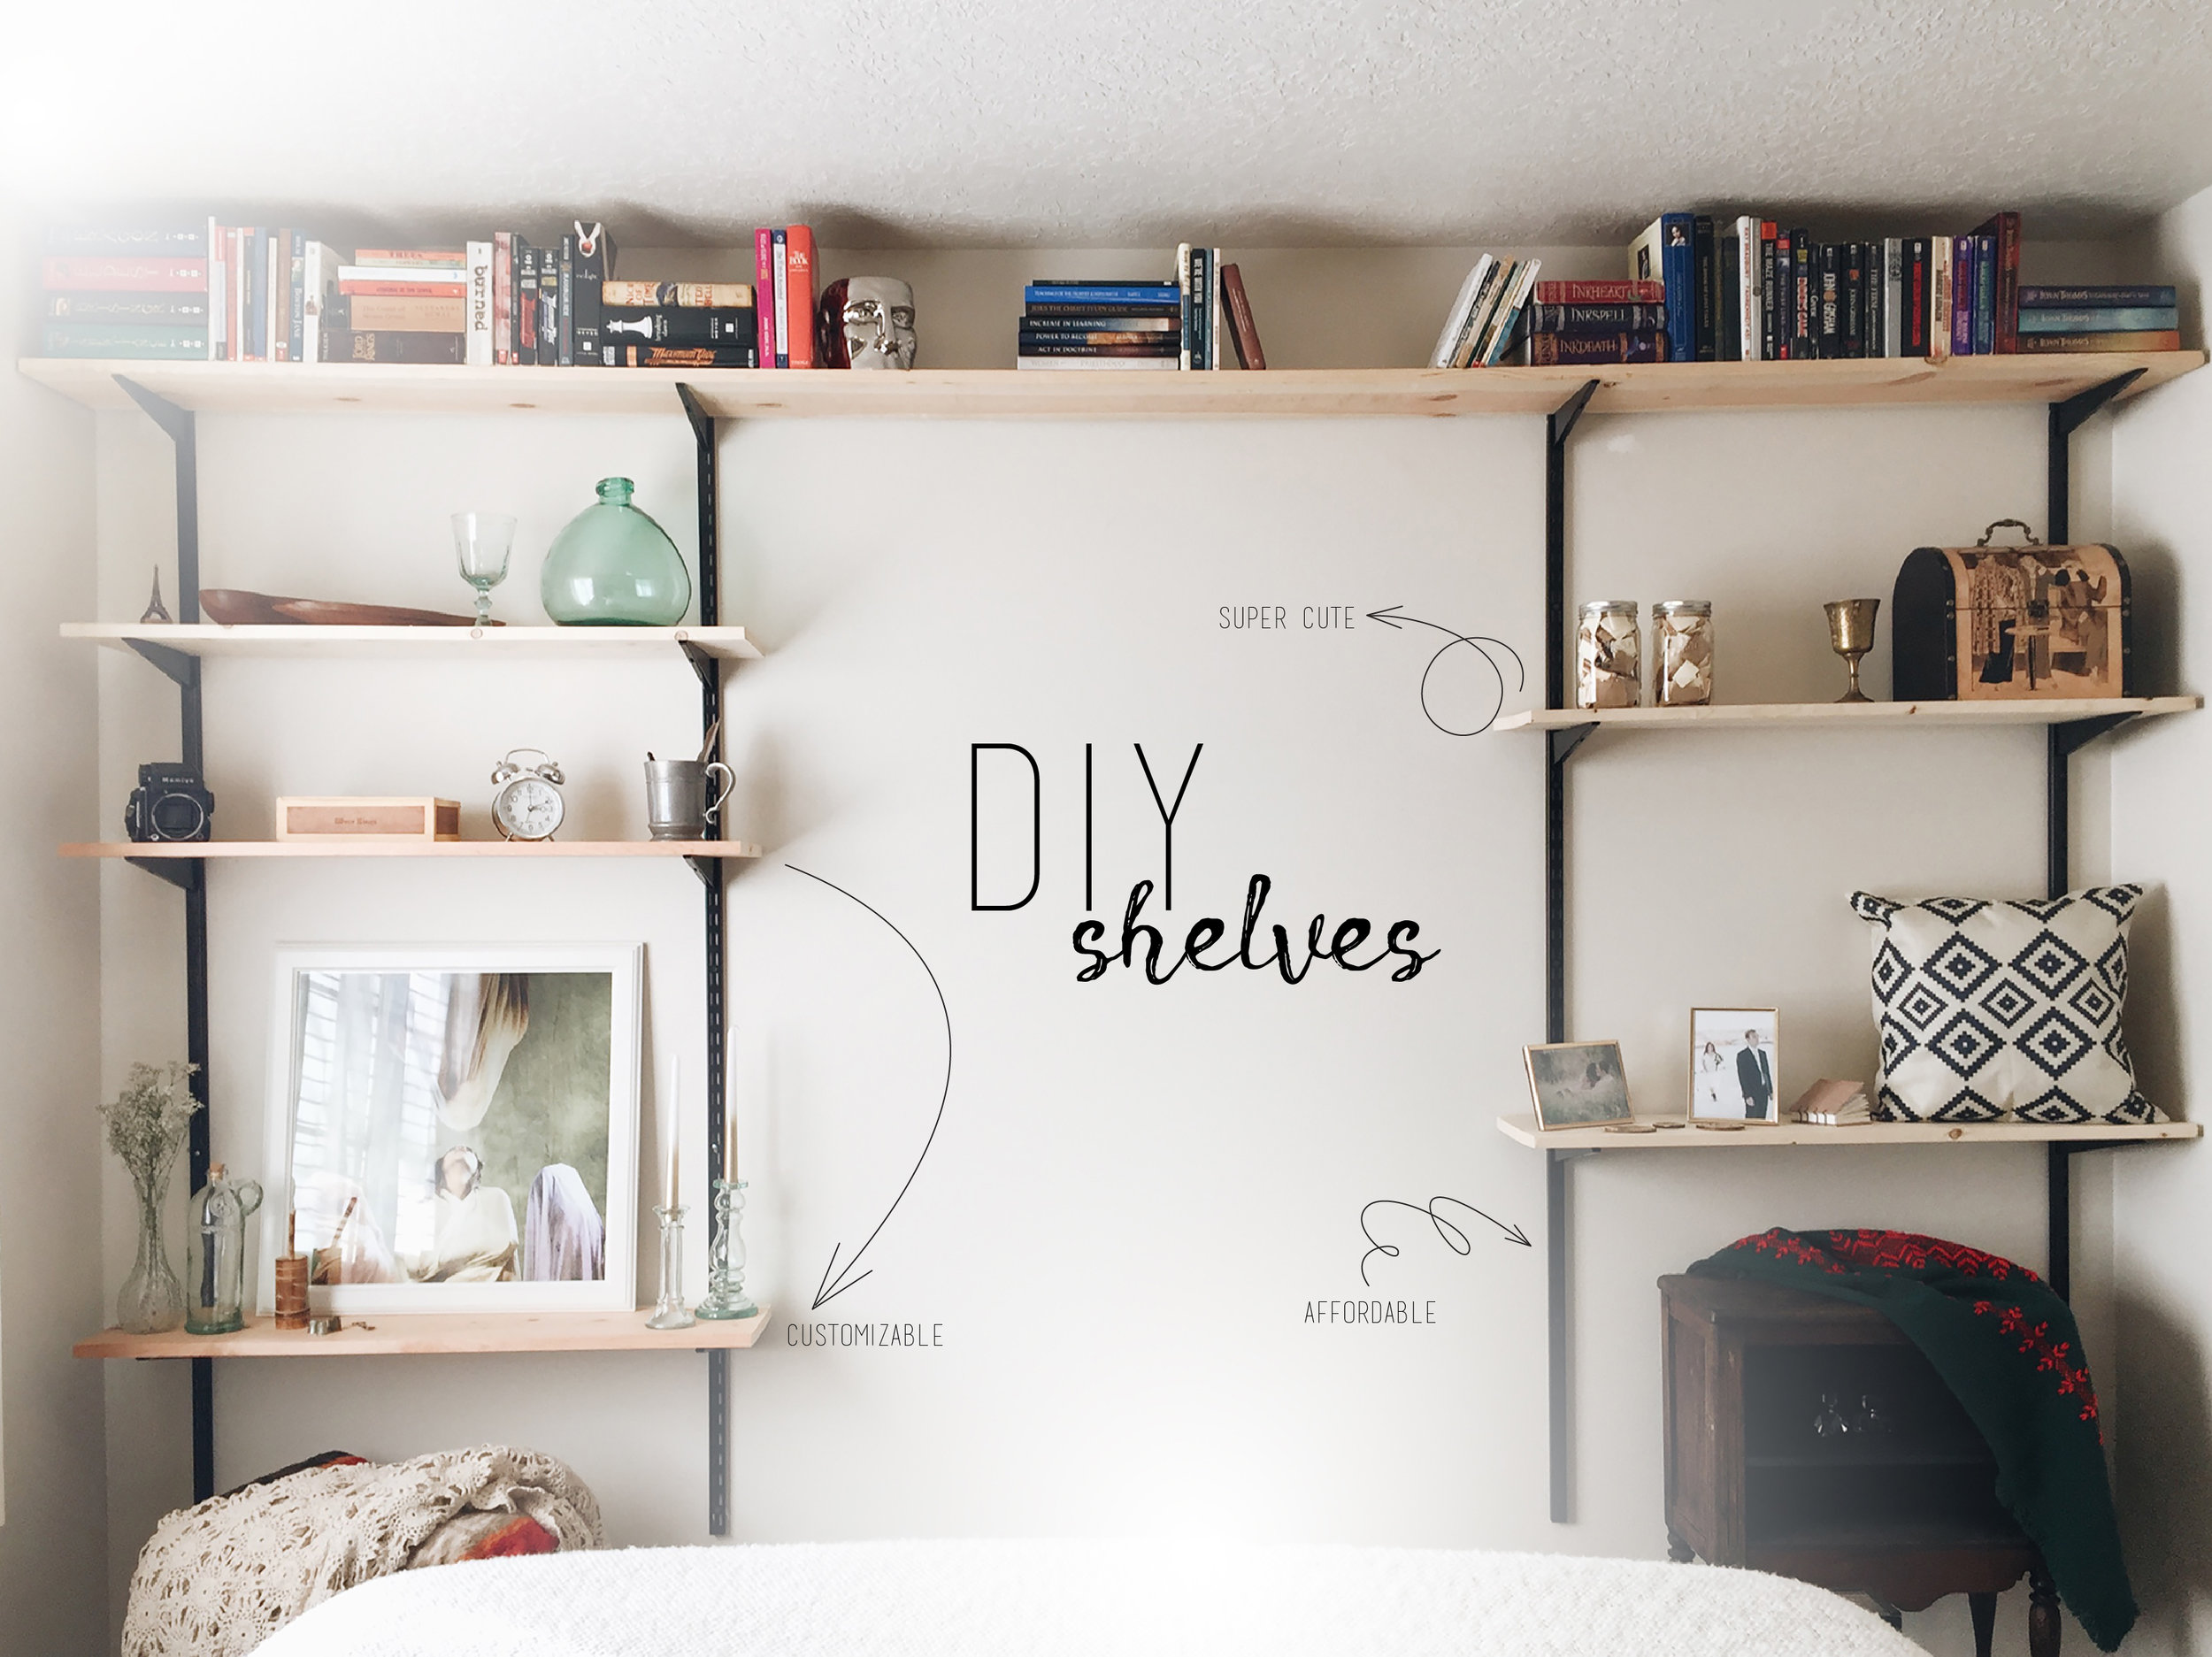
We felt that we too could create a fun shelving unit for a fraction of the price! And not only that, but it is completely customizable! We are having a blast moving shelves around and creating new looks.
So here is what we used, each item links to where we bought them:
6 pieces of wood ¾” thick, to achieve this we bought:
1 12 ft piece
1 10 ft piece
1 8 ft piece


Instructions:
Tyler and I spent a good time measuring the wall and visualizing our shelving unit in that space. Our room is quite small and so we knew that the shelves couldn’t stick out too far otherwise there would be no walking space. We wrote down all of our dimensions and drew up a plan that we both loved AND would allow us to have enough room for a TV in the future! (Guys, TVs are expensive so we have been holding out! Haha.) We knew the next step would be to find the studs in the wall and buy supplies …
Which leads us to realizing that this particular wall had very thin and oddly placed studs. We knew that we would not be able to use the wood behind the wall to hold up our shelves. Thankfully, Papa Budding (aka: Jen’s father) is amazing and a genius and super willing to help; he suggested we use toggles. These toggles allowed us to place our uprights anywhere we wanted on the wall and they are heavy duty and will hold a lot of weight! So we were very glad that we could find an answer to our problem! But if you have studs in your wall, use them!
We measured the wall and hung our uprights using our toggles! Two toggles were used per upright, one towards the top and the other towards the bottom. Again, we based all of our decisions with the dream that one day we might have a TV to place in the middle hehe.
This next part was a little tricky. We remeasured the space between our uprights and our “future TV” and decided to cut our wood shelves at 38.5 inches. This number will vary depending on the size of your room and the look you are going for. Lastly, we knew we wanted the top shelf to be the length of the unit so that we could put all of our books up there.
We went to Lowe’s after doing all of our math and we figured out that the best way to get all of the shelves we needed was to buy a 12 ft, 10 ft, and 8 ft piece of wood. A nice lady worker there cut our 10 ft and 8 ft wood into the five 38.5 inches and then shaved off a little of the 12 ft wood.
We sanded our wood but kept the natural wood color. In the future, we plan on staining the wood a darker color. Just make sure you sand the wood because they are pretty rough! And then you can stain them any color you would like.
We set everything up and spent hours arranging and rearranging our shelves! It’s the best part about these, the ability to customize them as we wish.
For those of you interested, this project came out to less than $130!
And for us it seemed even cheaper since we didn’t purchase everything at once and slowly bought our supplies over the space of a couple months!
Might take a little more patience, but in the long run will not hurt your wallet all at once!
Let us know what you guys think of our shelves!
And let us know if you tried them in your home!
Share your pictures and tag us on Instagram @thewandryway.
Have any other tips or ideas for us? Drop us a line.


